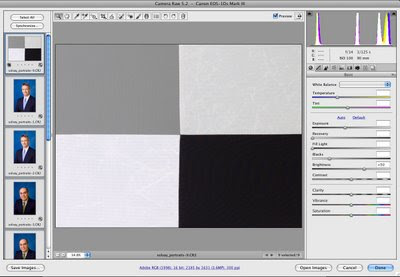
The target has 4 patches of very neutral tones. They are created to give you a nice middle gray, and black with detail, a white with detail, and a forth tone of white that is slightly darker the white with detail patch.

When starting a new photo shoot, you set the custom white balance by shooting a reflective image filling the frame with the middle gray patch, or shooing through the semi translucent white patch for an incident reading.
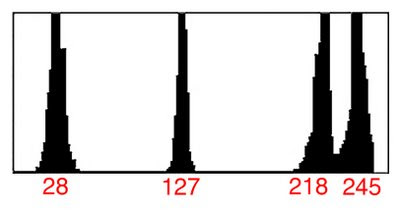
Once the white balance is set, you then photograph the entire target filling the camera frame with all 4 patches that will give you a very unique histogram. What you are looking for is 4-peek histograms that will help you determine the proper highlight contrast. If you can get the two lighter peeks to have slight separation between them, you will have proper highlight contrast and exposure.

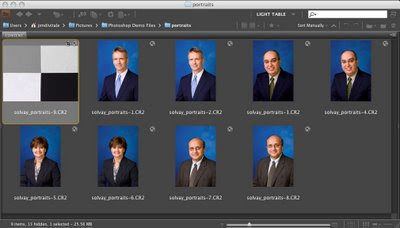
When working with a group of images that are shot under the same lighting situation, you can open all of them up in Adobe Camera Raw or Lightroom and enhance the tonal range to all of them at once by adjusting the histogram of the target and applying the enhancement to all the files at once. This will save a great deal of processing time and help with consistency between all the files on the shoot. You can find out more information on the Photo Master Target at www.photomastertarget.com. You can use the discount code 68VT284 that J F has provided for all my readers. You won’t be disappointed.

When starting a new photo shoot, you set the custom white balance by shooting a reflective image filling the frame with the middle gray patch, or shooing through the semi translucent white patch for an incident reading.

Once the white balance is set, you then photograph the entire target filling the camera frame with all 4 patches that will give you a very unique histogram. What you are looking for is 4-peek histograms that will help you determine the proper highlight contrast. If you can get the two lighter peeks to have slight separation between them, you will have proper highlight contrast and exposure.

When working with a group of images that are shot under the same lighting situation, you can open all of them up in Adobe Camera Raw or Lightroom and enhance the tonal range to all of them at once by adjusting the histogram of the target and applying the enhancement to all the files at once. This will save a great deal of processing time and help with consistency between all the files on the shoot. You can find out more information on the Photo Master Target at www.photomastertarget.com. You can use the discount code 68VT284 that J F has provided for all my readers. You won’t be disappointed.

No comments:
Post a Comment